Autonomous LIDAR Drone
An unmanned ground vehicle that operates using AI software that controls both the navigation and operational software.
How it was created
The Autonomous LiDAR Drone was created and designed for my Design Project Course for Electrical Engineering. Our group consisted of 3 members: Michael G Atip Castronuevo (me), Matthew Gonzalez, and Rafeal Cruz. Our initial design ideas consisted of simple drones that used infrared and sound sensors. Due to their simplicity, we challenged ourselves in making a drone that primarily utilized LIDAR as our primary sensor and ensured that it was robust enough to navigate unmanned.
What is a LIDAR drone?
We first have to define what a drone is. It is a machine often controlled remotely or autonomously by a computer. In our case, we attached a Raspberry Pi running a Ubuntu Desktop, which acts as our computer. Below are some crucial aspects needed to run our drone.
Now a quick summary of what LiDAR is. It is an acronym that stands for Light and Detection Ranging. Essentially it is a rapid recording laser sensor that sends out continuous light beams. When that laser beam encounters an object in its path, it bounces off it and returns to the LiDAR sensor. Then records how far that object is based on the flight of path time recorded.When combined, the recordings can show a 2-D/3-D map.
Thus, a LiDAR drone combines these two components where our drone uses a LiDAR sensor for map-making and distance measurements.
A deeper look in the software and hardware
Creating a drone is no simple task; it requires a lot of hardware and software to make sure it moves, let alone use the LiDAR sensor. Below are brief overviews of the software and hardware designs.
The software
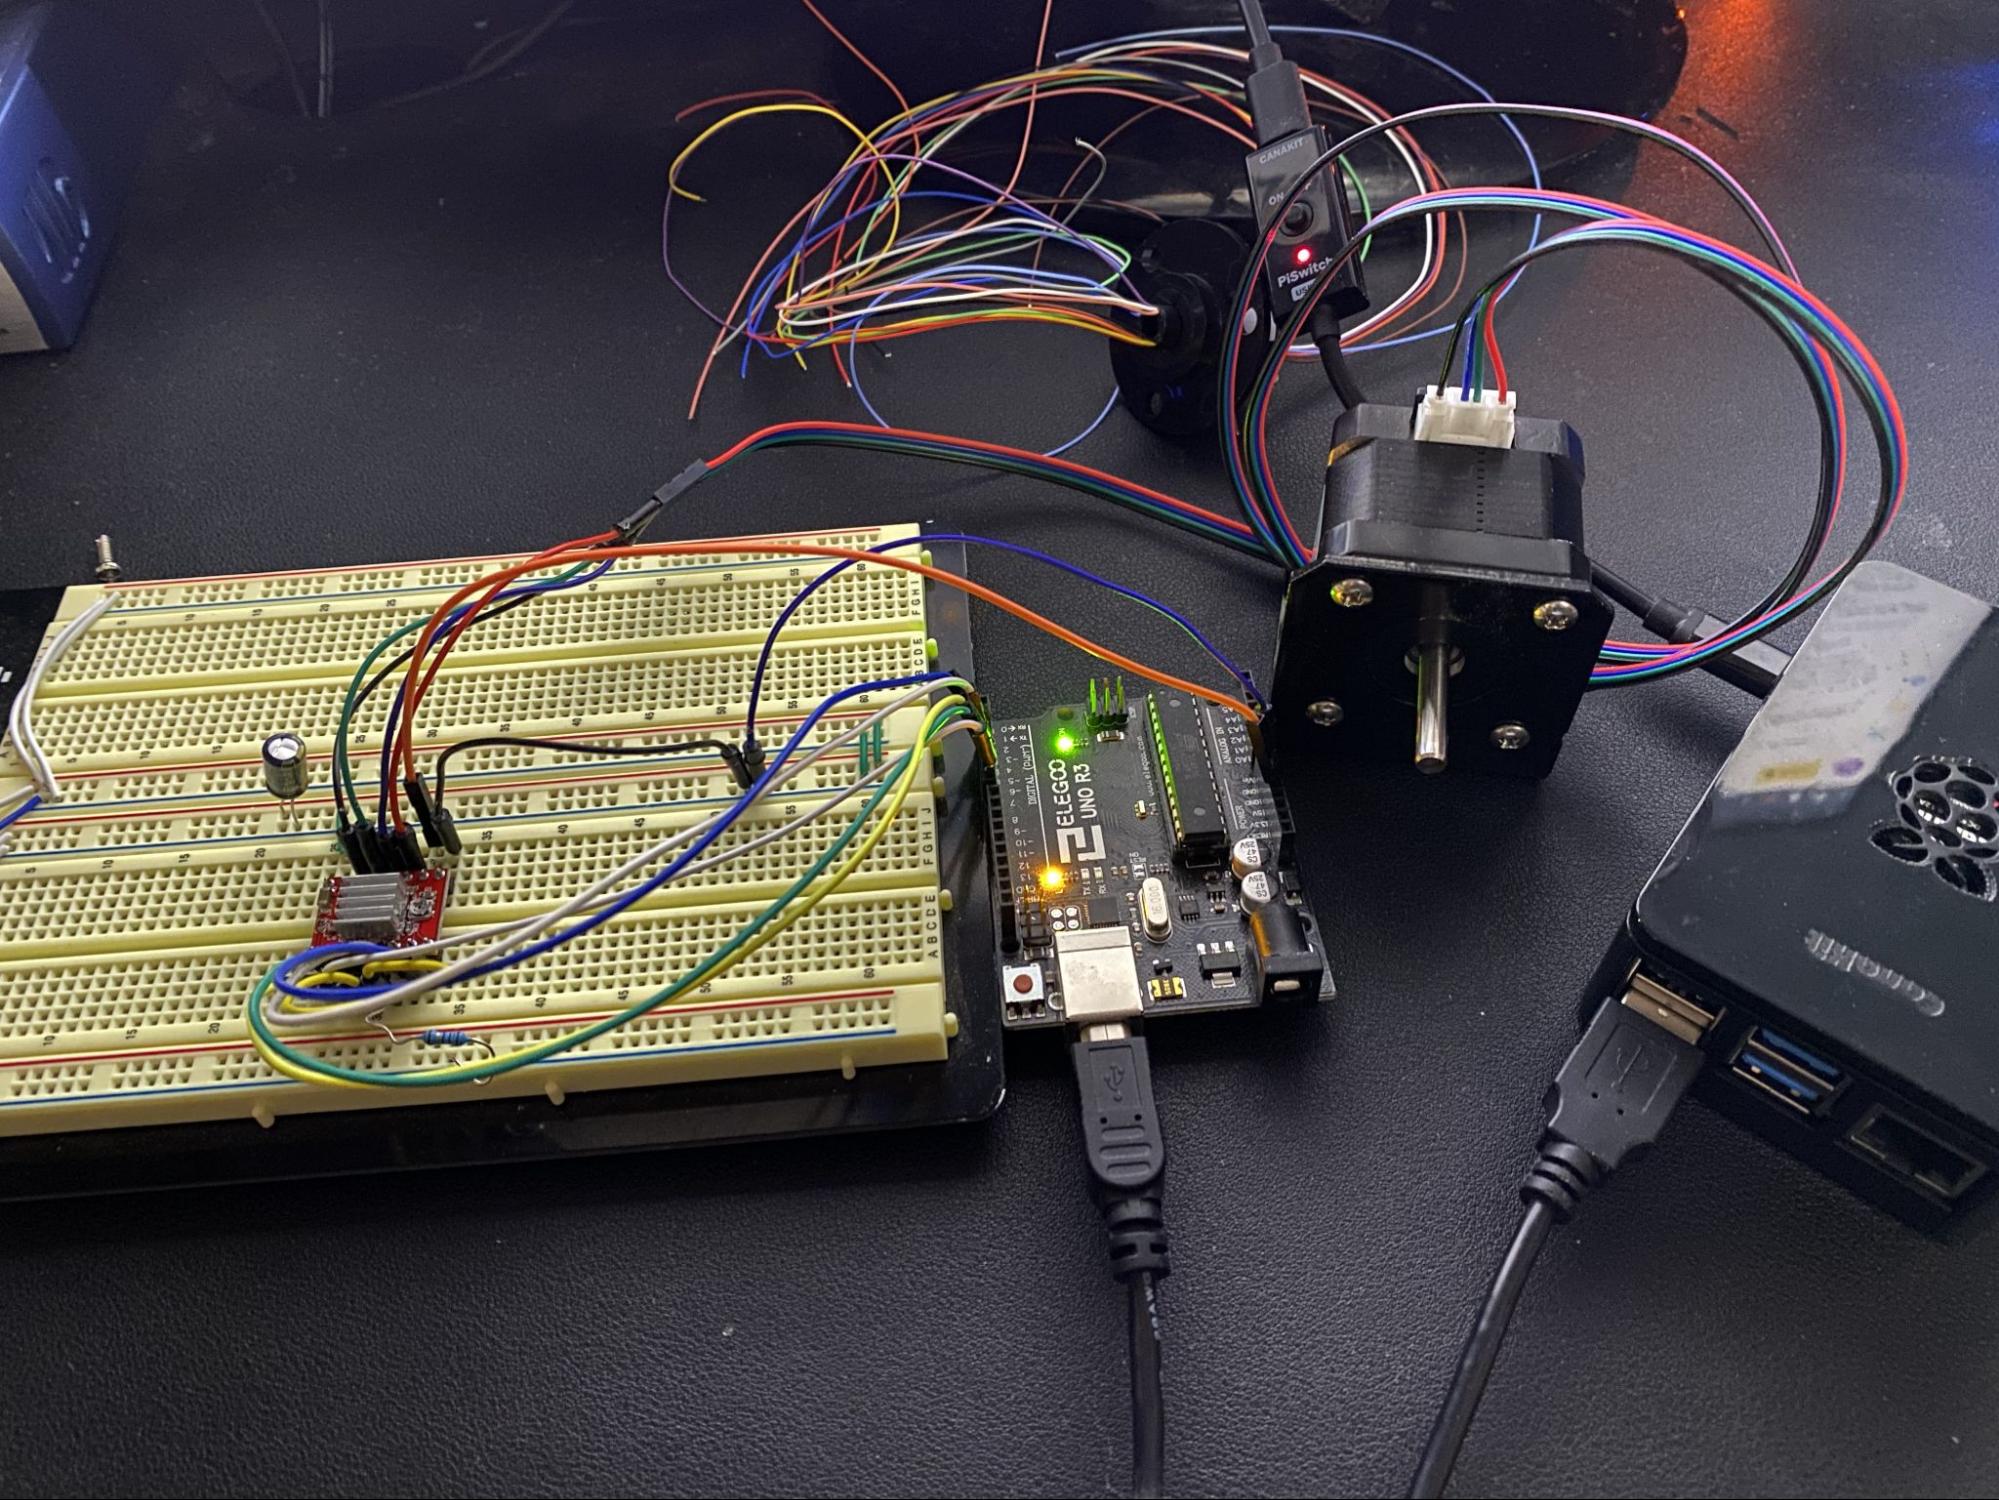
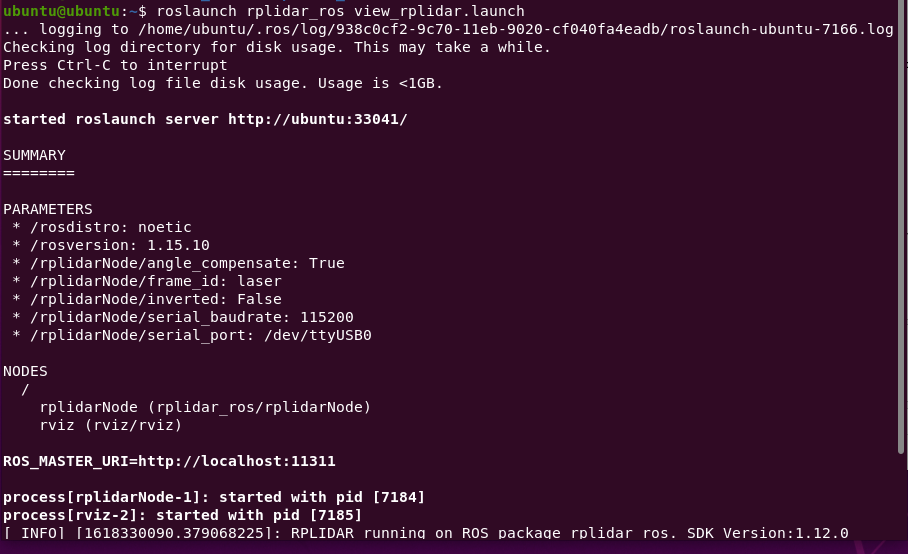
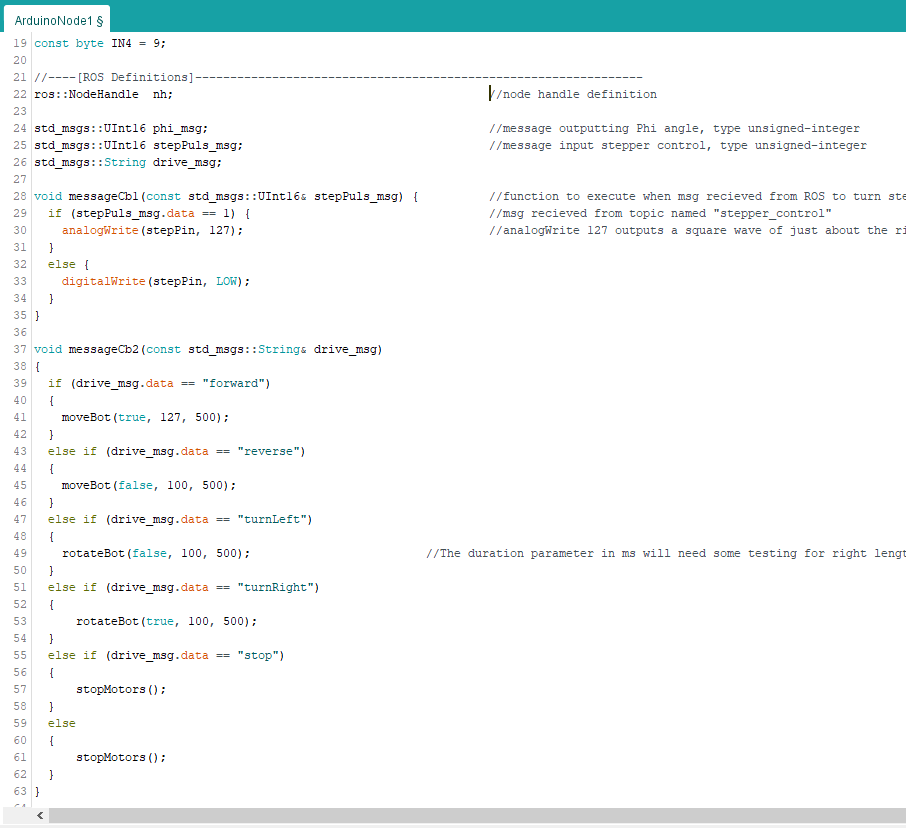
We connected a Raspberry Pi with Ubuntu mounted on it. The leading software ROS was installed and controlled almost all aspects of the drone. ROS, which stands for Robotic Operating Software, recorded data from the LiDAR sensor and navigated the drone. To manage the DC drivers to make the drone move, we connected an Arduino.
Here are some pieces of our code from our ROS interface and Arduino.
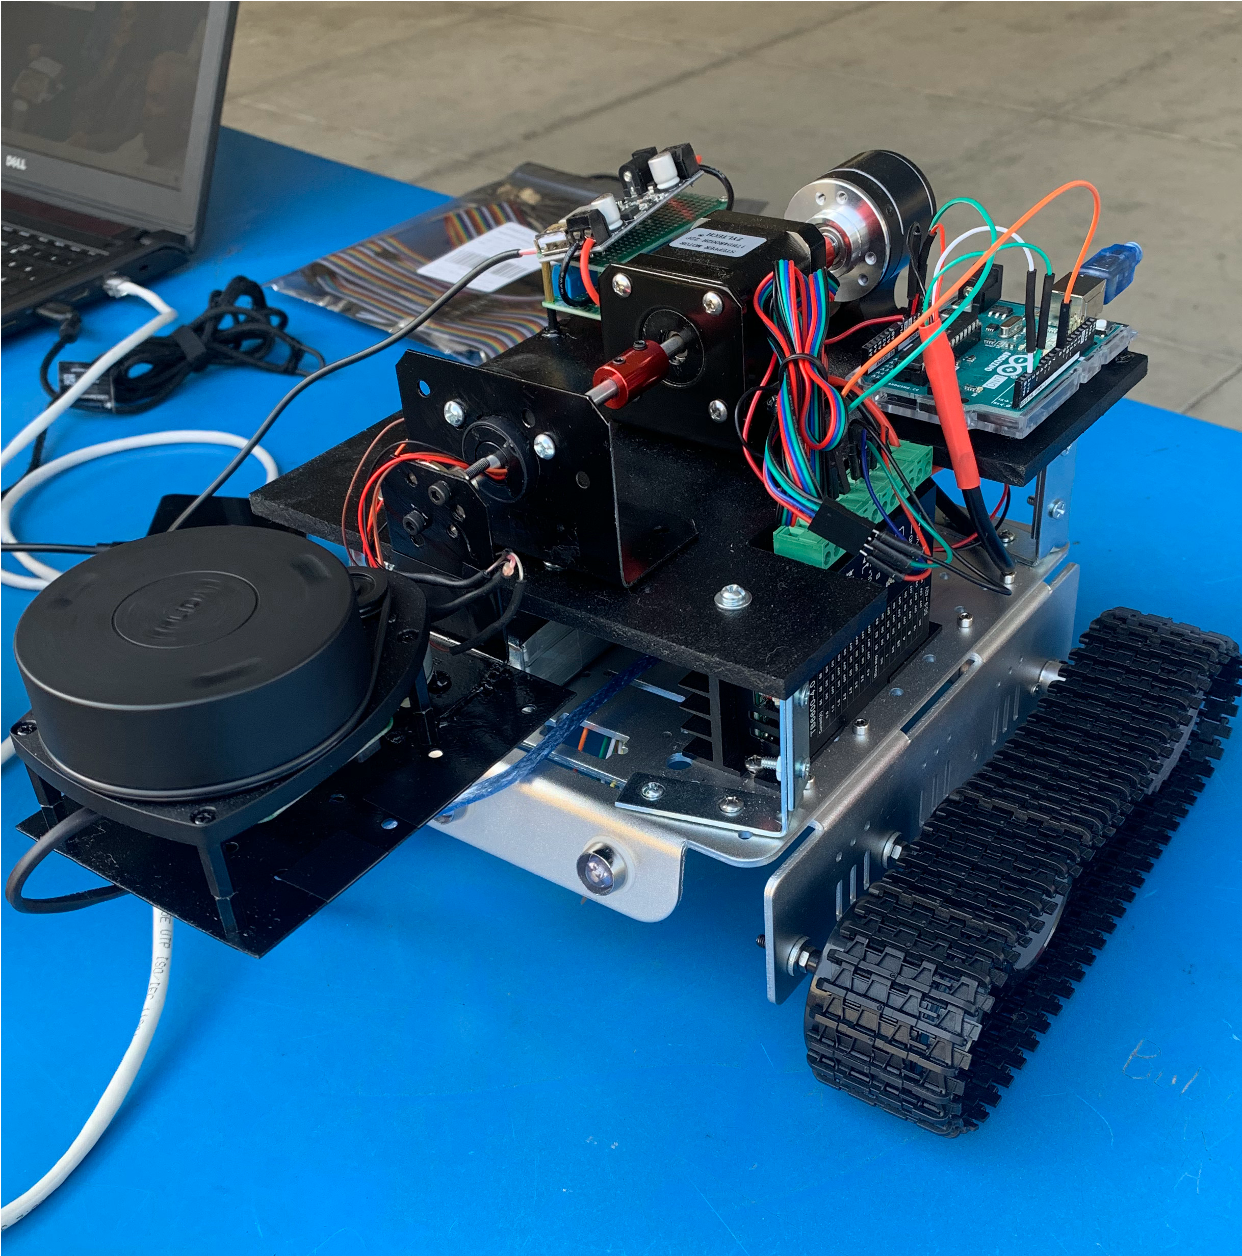
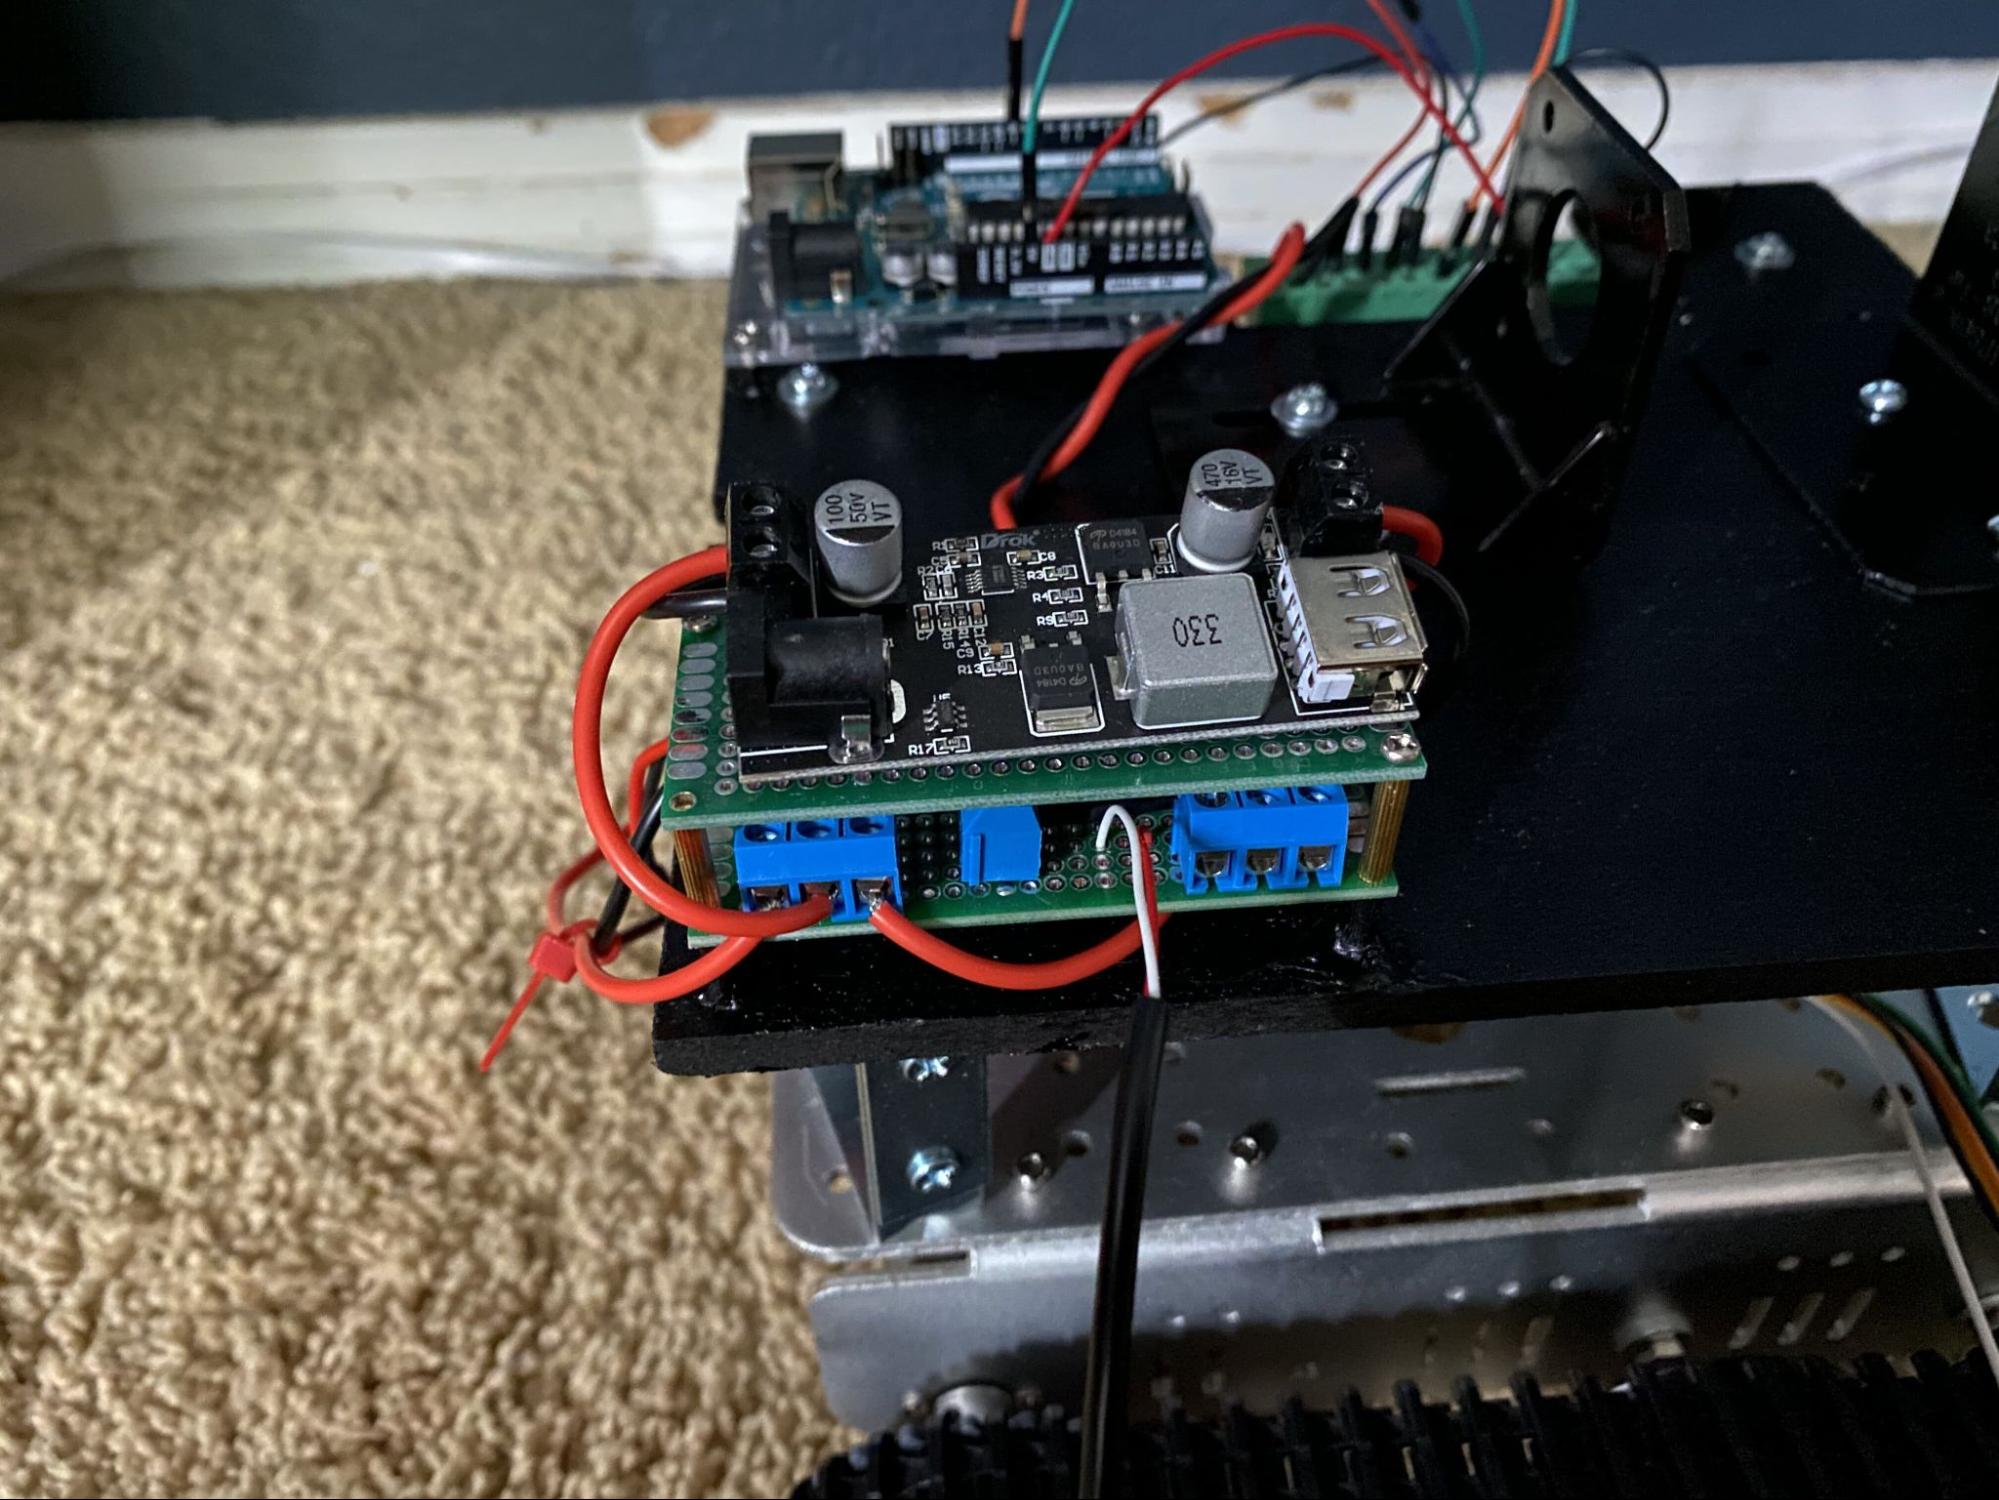
The Hardware
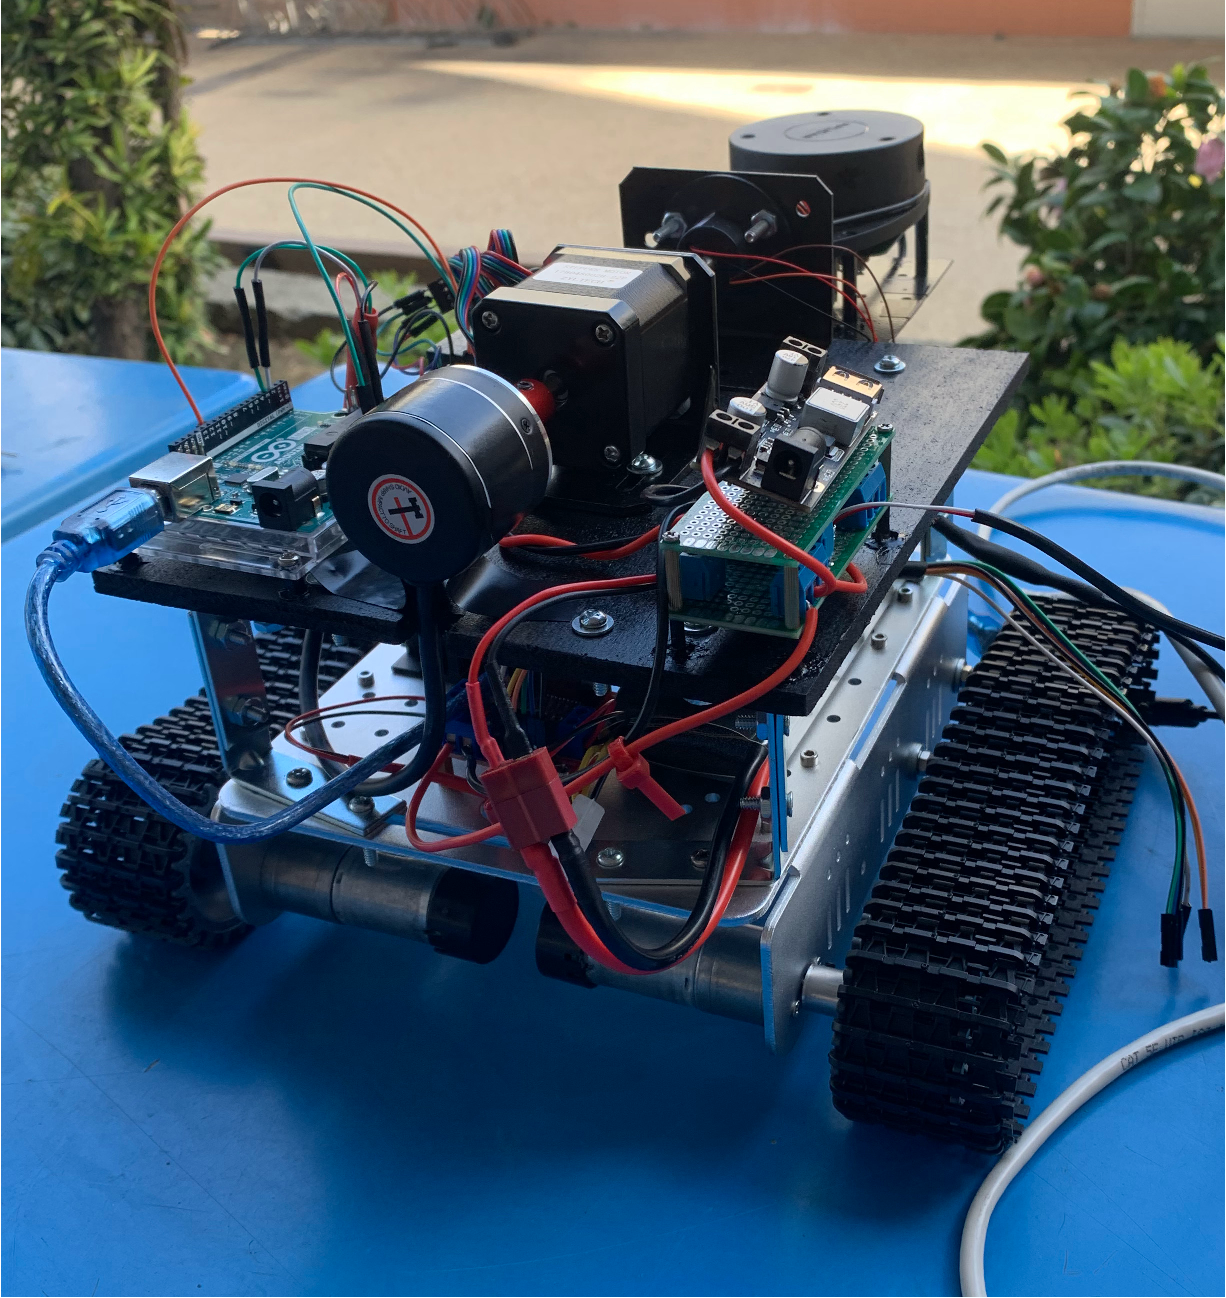
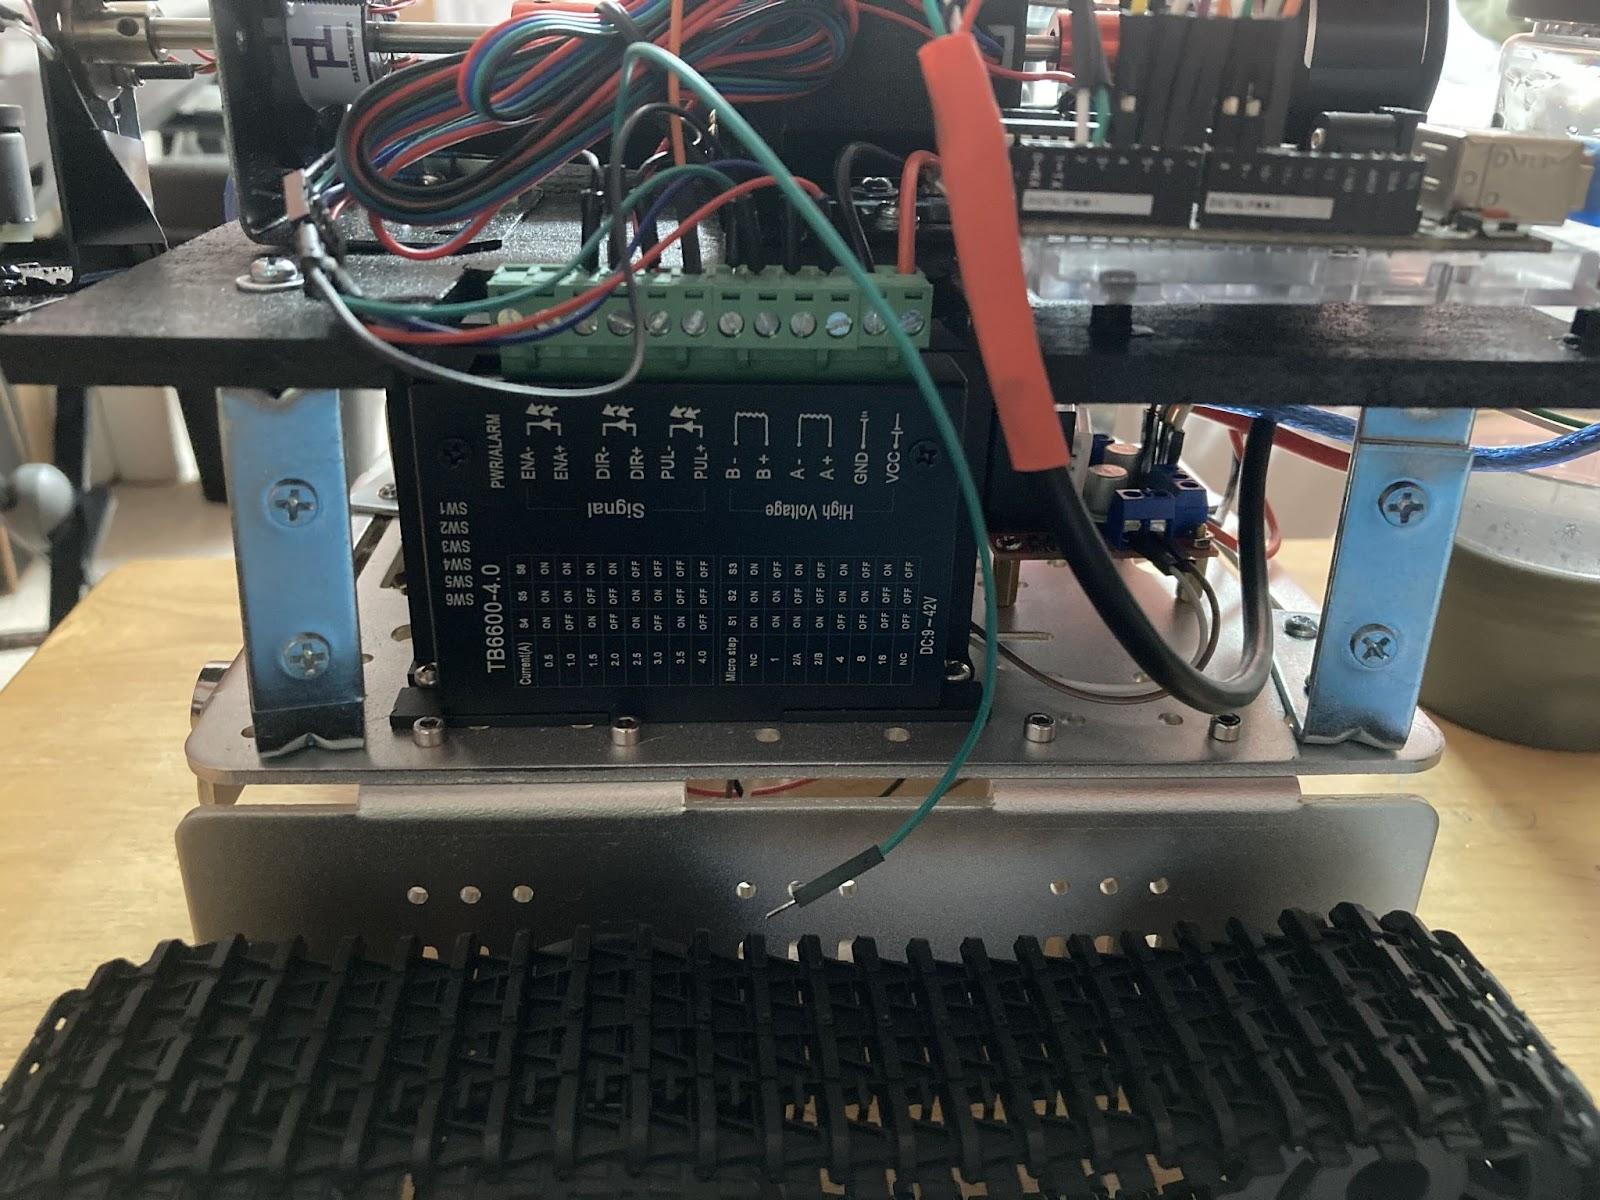
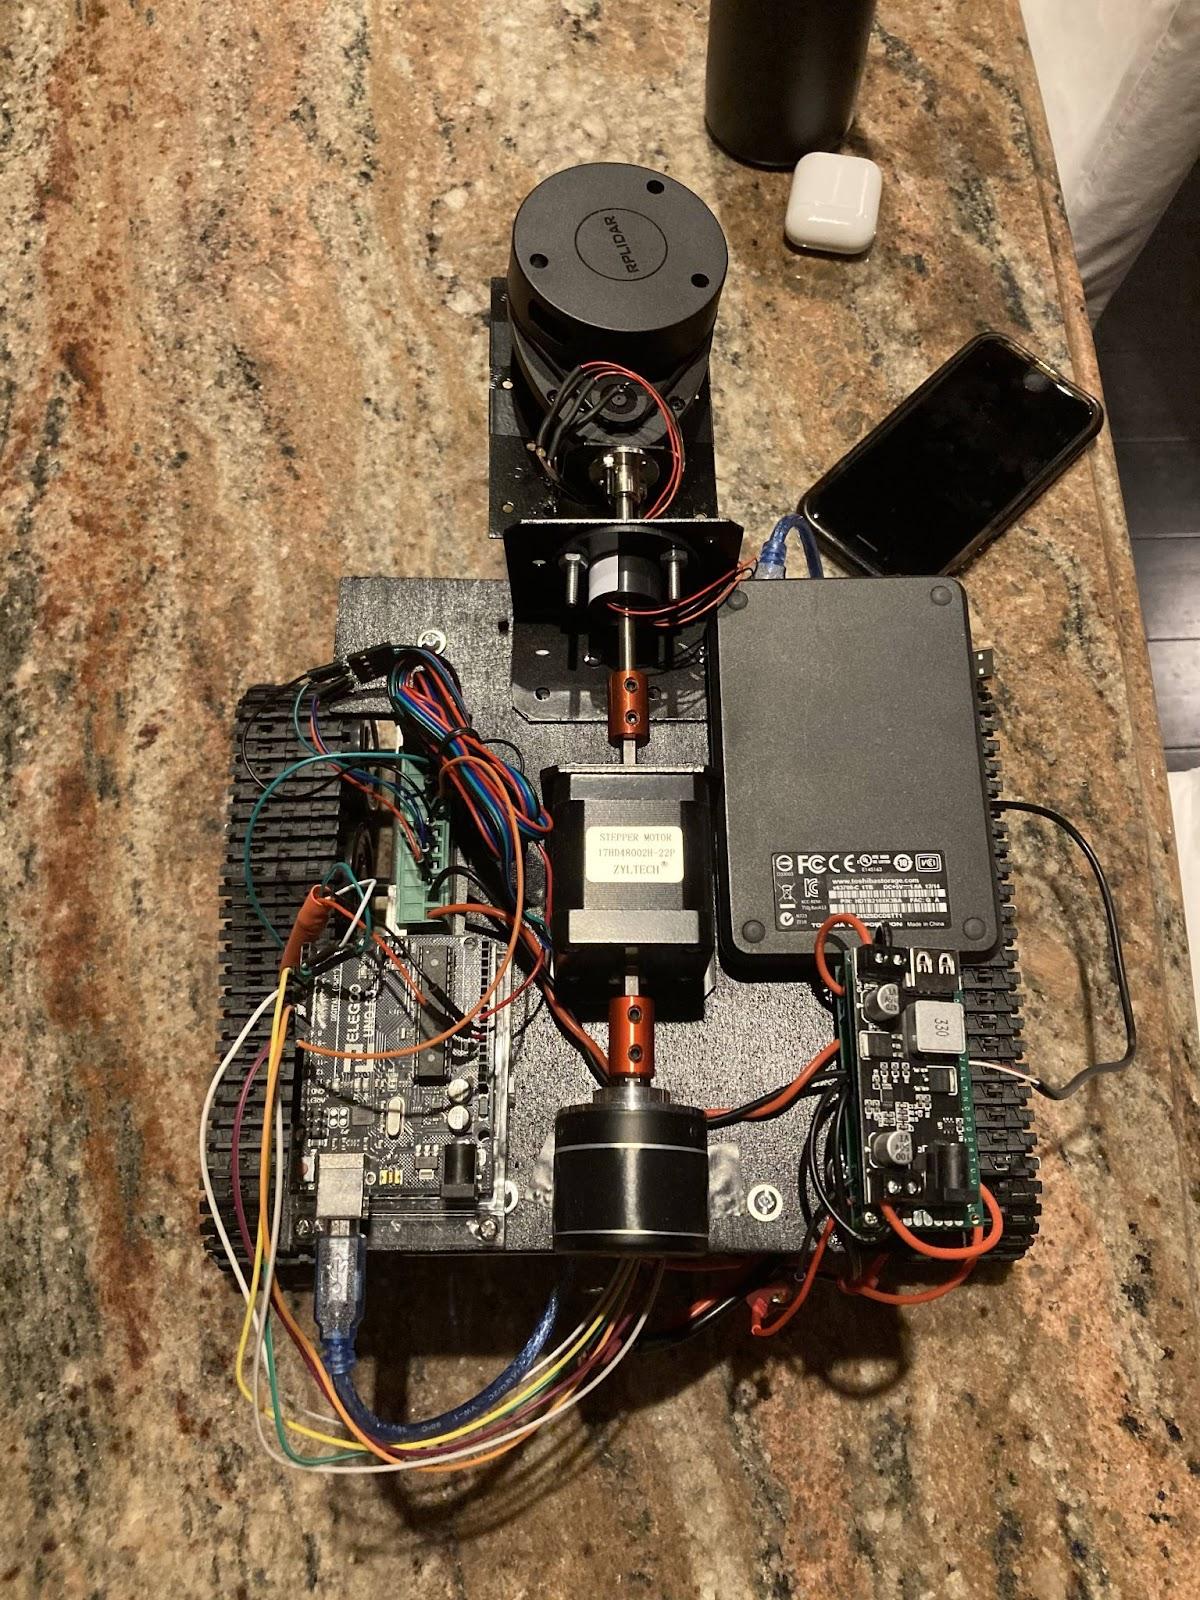
The main components consist of 5 motors, the chassis, a 12V battery, a Raspberry Pi, and Arduino. Two motors are placed on each side to move the tracks. Then one final motor for the LiDAR sensor. To make everything run, we attached a 12V battery to power the drone and a buck converter to power both the 5V requirement of the Raspberry Pi and Arduino.
The drone in motion
Using Hector Slam it will map out the surrounding area, we see that as the small red line moves the map continues to be update.
Here are videos of the drone in action
Want more information?
Here are some references we compiled when we made the project
Get in touch
If you have any questions regarding the drone, send me a message! Or send another message to Matthew, a collaborator of the group. Send a message via LinkedIn.
© Michael G Atip Castronuevo. All rights reserved. Design: HTML5 UP.